
I finally wanted to setup my own kubernetes cluster as everyone I talk to, said its the hottest shit.
I’m using three VMs, hosted at Netcup running the latest Debian 9 Stretch build. I’ve installed most basic tools for me and also already set up docker using this amazing ansible role. Make sure to disable any swap you have configured – kubelet will not start otherwise.
The documentation on how to install things is pretty good, but I’ve missed some details, that I banged my head on, so I will copy most snippets over for future reference. Keep in mind, that this might have already changed and is no longer working at the time you read this.
First install all needed CLI tools on each of the three hosts:
apt-get update && apt-get install -y apt-transport-https
curl -s https://packages.cloud.google.com/apt/doc/apt-key.gpg | apt-key add -
cat <<EOF >/etc/apt/sources.list.d/kubernetes.list
deb http://apt.kubernetes.io/ kubernetes-xenial main
EOF
apt-get update
apt-get install -y kubelet kubeadm kubectl
Start the systemd Service for kubelet, our kubernetes manager – also on every node.
systemctl enable kubelet && systemctl start kubelet
Now the docs are a bit unspecific, but here’s a command to set the correct cgroup on Debian 9.
First check what cgroup docker is running under:
docker info | grep -i cgroup
Then use this replacement command to add the cgroup to the systemd service file and restart kubelet:
sed -i "s/bin\/kubelet/bin\/kubelet --cgroup-driver=cgroupfs/g" /lib/systemd/system/kubelet.service
systemctl daemon-reload
systemctl restart kubelet
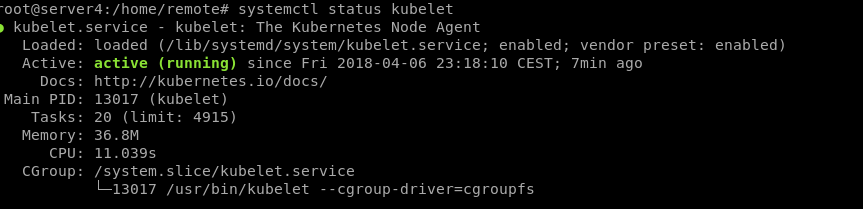
Verify everything is working with:
systemctl status kubelet
If you see a failed state, you can use journalctl -xe to check for the error message. (You did disable your swap right? ;] – Hint swapoff -a)
Now we should be ready to setup our master node.
kubeadm init
If anything goes wrong, you can reset your master node using the following:
kubeadm reset
At this point init took me all the way and got stuck on the following message:
[init] This might take a minute or longer if the control plane images have to be pulled.
In my logs (journalctl) I could see some message related to docker, cni and Network problems. A quick google search lated lead me to this quickfix:
#domain bestsrv.de
#search bestsrv.de
nameserver 46.38.225.230
nameserver 46.38.252.230
Comment out the domain and search part in that file.
Then I got the following message:
"server4" is forbidden: not yet ready to handle request
Turns out, I had a service listening on port 80/443/8080 – make sure to stop that before you run init.
After that we need to install a pod network, that will allow our pods to talk to each other. By default kubernetes only bundles rudimentary networking but to fully utilize all feature, we will use weave:
export kubever=$(kubectl version | base64 | tr -d '\n')
kubectl apply -f "https://cloud.weave.works/k8s/net?k8s-version=$kubever"
To enable the master to run pods, run the following command:
kubectl taint nodes --all node-role.kubernetes.io/master-
Then run the following command on your two other servers:
kubeadm join --token <token> <master-ip>:<master-port> --discovery-token-ca-cert-hash sha256:<hash>
To finish up, we will copy the kube config file to our local machine in order to administer the cluster locally.
mkdir -p $HOME/.kube
scp server4.wdkk.de:/etc/kubernetes/admin.conf .kube/config
chown $(id -u):$(id -g) $HOME/.kube/config
Now we have a ready to go cluster and start using it.